Declutter These 11 Items To Celebrate Getting Your COVID Vaccine

With more people becoming eligible to get the COVID-19 vaccine, the promise of a post-pandemic world is near. We still have a ways to go before we're back to normal. But getting vaccinated is one way we can do our part to get there faster.

I don’t know about you but when I received my vaccine, I was empowered. Like I could take on the world! I couldn’t wait to get to my next client’s house and celebrate by doing what I love most: organizing and creating systems that help people.


If you’re looking to celebrate your recent vaccination why not do a little decluttering? Below are 11 items you can declutter from your home, giving it a similar refreshing feel.


When the world first shut down people purged a lot of stuff. But now that we’re gearing up to get out of the house more, we shouldn’t neglect the things that pile up. So before you start seeing friends and family, take the time to declutter these items. Then you can really re-enter the world feeling amazing.


  1. Worn out Masks

vera-davidova-YHZIGRwk764-unsplash.jpg

First, take a look at any masks you have. We’re still going to be wearing them for a while so now is the time to see which ones could be recycled. If the strings are too loose on your ears, toss it. If the mask doesn’t cling firm to your face, toss it. Buy some new patterns or designs. Replenish the ones you’re recycling with fresh ones to keep you safe.

Be sure to check your kid’s masks too. If any are too small for their face, order new ones. Since they’ll need them for school, it’s important to be well-stocked.


2. Delivery packaging

When stores shut down, online shopping became the go-to. Even after stores opened, people — still hesitant — continued to do their shopping online. This meant deliveries, sometimes on a regular basis. If it wasn’t groceries, it was clothes, toys, or beauty products.

Talk a walk through your home and see how many packages you can find. You might be surprised to find a few unopened ones. Remove the interior packaging and recycle appropriately. Break down any cardboard boxes and add them to the next pick-up stash.

3. Leftovers and take-out containers

In the thick of quarantine, our favorite restaurants were also temporarily closed. When they reopened, we wanted to help them stay in business. This led to an increase in take-out and curbside delivery. This then led to an increase in the number of containers you store in your house.

Check the area where you keep food storage containers. Do you notice an excess of them? If so, decide how many you’ll actually need and recycle the rest. Same goes for leftovers. Always check your fridge the night before garbage pickup. Toss any leftovers that don’t smell good or you know you’ll never eat.

4. Clothing you won’t need any more

Photo by Sarah Brown on Unsplash

Photo by Sarah Brown on Unsplash

A few companies have made working from home a permanent thing. Employees will no longer have an office building to go to each day. If you’re one of the people whose business has made this leap, it’s time to sort through your work clothes.

Discard duplicate items or ones that don’t fit anymore. It’s fine to keep some on hand. In-person events and meetings will come back in style. But if you’re not going to the office every day you probably don’t need three blazers and six pairs of work pants. Reduce and keep only one of each professional basic.

Do a similar check on your loungewear and workout clothes. Are there any you’ve worn to dust? If so, recycle them.


5. Pantry and non-perishable foods

Many of us stocked our pantries full of food at the height of the pandemic. We got so used to this that we continued to overbuy just in case. Now is the time to sort through your pantry. Be ruthless. If you know you won’t ever eat it, get rid of it.

If food is still good, bring it to your local food pantry or offer it to a friend or family member. If it’s expired, throw it away. Never donate expired food! It may feel like you're throwing money away, but it's already spent. Throwing it away won't make it return to your wallet.


6. Unfinished DIY projects

You can only watch so much Netflix and Hulu. People took up new hobbies during quarantine to give them something productive to do. Knitting, embroidery, painting, woodworking, and more. Whatever your interest was, there was a YouTube video for it.

Before you rush out the door to meet your friends for lunch, consider any unfinished DIY projects. Ask yourself: Am I ever going to finish this? If you’re not, it’s ok. It did what you needed it to do. Don’t let it sit there and collect dust. If you’re 100% positive you won’t pick it up again, discard it. Or ask a friend or family member if they’re interested in finishing it for you.

Just because you might not continue your new hobby doesn’t mean someone else won’t.

7. Books and magazines

Photo by May Gauthier on Unsplash

Book sales went up during the pandemic, which was great. Books have always been a fun activity. They’re transportive and can teach you something new. But books and magazines can pile up before we know it.

Spend some time looking through your bookshelves. Are there any books you loved but won’t read again? Donate them. Give them to a friend. Bring them to your local library or Free Little Library. Don’t let a book sit there unopened. Someone else might need that story and you can give it to them.

Sort through your magazines as well. Recycle any you read through. If there’s a specific article you want, cut it out and recycle the rest. Schedule an hour in your day to do this.


If you’re in the market for a new organizing book, look no further than this website. My book, The No-Nonsense Home Organization Plan, helps you transform your home into a calm and orderly safe haven. Learn more here.


8. Games and puzzles

Did you start a family game night? How about a Zoom game night with friends? Texting, emails, and social media could connect us with our loved ones only so much. We wanted to see faces and have physical laughs. And so people scheduled weekly or bi-weekly game nights.

Do keep this tradition going, but declutter any games and puzzles you're done with. It’s rare to put the same puzzle together twice and you might grow out of a game or find something better.
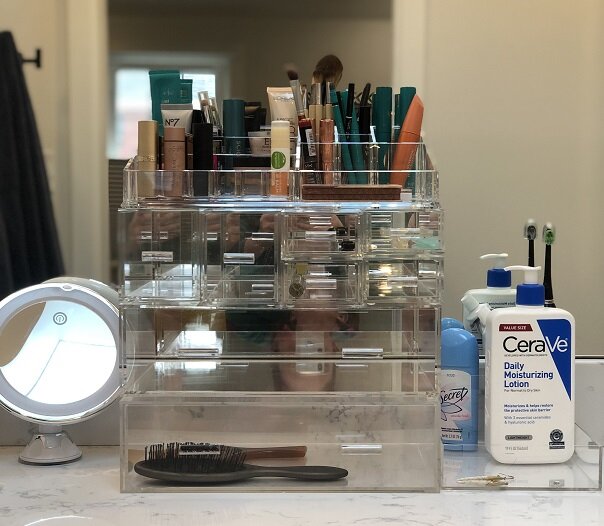

9. Old makeup

When we were quarantined, who was there to put makeup on for? It didn’t matter if you preferred a natural look and used very little or if you contoured your entire face. My makeup was barely touched during the height of quarantine. What about you?

Now’s definitely the time to replenish any old makeup you have. Take some time to sort through your stash and decide what you want to keep. Keep products and colors that represent the you of now. Our tastes might have changed over the last year.


Don’t know how to throw away old makeup? No worries. Check out last month’s blog post here. It breaks it all down for you.

10. Unused kitchen gadgets

Another thing many of us did during quarantine was pick up new cooking projects. How many posts did you see on social media of someone having made sourdough bread? But with new hobbies comes new gadgets.

Before you venture back outside, take a look through some of these tools you bought. Do you plan on making sourdough bread again? What about that Instant Pot? Or blender? Donate any unused kitchen gadgets. Don’t hang onto something you think you might need again someday. Chances are a friend or family member will have a blender if you need it.


11. Outgrown toys

Don’t skip your kids’ rooms. Use this time to sort out any toys your kids have outgrown. Since everyone was home for the better part of a year, you saw what they gravitated towards and what they didn’t.

Check with your local women’s shelter. They’re often looking for gently used toys. Or a local pet shelter. A dog might love to cuddle with your kid’s old stuffed animal. If you feel the need to check with your kids before purging, do so, but be careful. They might say yes and then never touch the toy. It’s hard to say goodbye.


There you have it. 11 things you should declutter to celebrate your newly vaccinated self. If you’re having a hard time trying to figure out what you should get rid of, don’t panic. Contact me today and let’s chat. I’d love to help you break free of your quarantine life and get you back out in the fresh air where we belong.


Get Your Garage in Order Once and for All With These Effortless Steps

 
pexels-pixabay-162553.jpg

Is your garage overflowing with stuff? Is it unorganized, dusty, and unable to stay neat for more than a week? Believe me, I know how overwhelming it can be to organize your garage. It’s the place many of my clients don’t want to touch, let alone look at for too long.

Why? Because too often we let our garages become a dumping ground for things we don’t want to deal with. Or things we don’t know what else to do with. So why not store it away in a place where other questionable items flock to?

I say no more! I’m going to teach you how to finally get that garage organized and clean. Better yet, the systems you put in place will help you keep your garage in order.

Ready to dive in? Me too!

Deep cleaning your garage

Before you can organize the space, you need to first give it a good clean. This will liven up the area, giving it a fresh feel and look. Since deep cleaning your garage is quite a large undertaking, schedule plenty of time to work on it. Choose a weekend or two to do nothing but this.

Will you be tired? Yes. But trust me when I say getting your garage clean and in order for good will be worth it.

In order to deep clean your garage, follow these steps:

1. Remove everything

Yes, everything. If possible, move your cars out onto the road and use your driveway. Will your neighbors think you’re crazy? Maybe. Will they think you’re having a garage sale? Possibly. But don’t worry about them. Get every single thing out of that garage so you have access to every inch.

2. Start at the top

Once everything is out, start dusting. Begin at the top. Shelves, cabinet tops, etc. Whatever is the highest point, start there and work your way down. This means less sweeping since you’ll have knocked all the dust off of surfaces. The last thing you want to do is sweep more than once.

After you’ve dusted and swept, vacuum any remaining dust particles. Finally, consider mopping the floor. Depending on the type of floor you have, you can use a damp-mop or do a full-on soaking. Either way, give the floor a few hours to dry after you’re done.

3. Seal and repair

Now that everything is clean, let’s work on some repairs. Do you have any cracks on the floor? Seal them up. Are the door sweeps or weatherstripping loose? Repair or replace them. A lot of dust can come through ill-prepared door seals so make sure those are sturdy.

4. Install an air filtration system

The reason most dust hangs around garages is because of the poor air circulation. Consider installing one to keep the air circulating in a way that limits the amount of dust. You should also get a dehumidifier. This will prevent mold and condensation as well as help with dust.  

A simple solution is a box fan.  We usually have one running in the garage, especially during the summer months.

5. Paint

This step might not be something you want to do and that’s fine. But sometimes when you’re reorganizing a room a fresh coat of paint can make it feel brand new. Use paint that can stand up to humidity and moisture. Remember, even with an air filtration system your garage will get humid. Be sure to protect your walls as best you can.

6. Assemble

This might be another step you decide to skip. We’ll talk more about shelving and storage solutions later. For now, if you’re interested in putting in new storage space, now is the time to assemble them.

Sorting and purging items

How amazing does your garage look? Almost brand new, right? It’s crazy how a good deep clean can give a space a facelift.

If you’re thinking it’s time to bring everything back inside, hold on a second. First, you need to sort through your things and purge what you don’t need or want.

Create three designated areas on your lawn:

  • Donate

  • Sell

  • Trash

If you haven’t looked through your garage stuff in a while, this may take some time. Be ruthless. Don’t keep anything you haven’t used in a year or more. Throw away anything that’s expired. Don’t keep equipment that doesn’t work. Sell things you don’t use, but are in pretty good condition.

Check local hardware stores. Some will buy back used equipment. Home Depot has a rental program for used tools and equipment.

For the tools and equipment you’re going to keep, clean them. You don’t want to bring dirty items into your freshly cleaned garage. All you need is a damp rag with a little cleaning solution on it.

After you’ve decided what you’re keeping, create categories. You can make a garden zone, a tool zone, holiday decoration zone, etc. You get the picture. This will make storing your stuff a breeze. Not to mention it’ll keep all like items together.

Photo by Anete Lusina from Pexels

Photo by Anete Lusina from Pexels

Storage solutions for your garage

You worked hard cleaning and purging your stuff. You’re ready to bring everything back inside. But before you do, let’s take a quick look at the zones you’ve created and the storage solutions you have.

Depending on the size of your garage, you should aim to have the following types of storage:

  • Overhead. Perfect for off-season equipment and sporting gear.

  • Wall-mounted. Perfect for often-used tools, bikes, suitcases, and food.

Your goal for storage is to try and keep similar items together. If possible, have a sporting corner, a tool wall, a decoration cabinet, and whatever else you might need. It’s okay if some things can’t be stored together because of space.

This is why creating these piles outside is an important step. You’ll be able to physically see how much of a certain category you have so you can adjust storage as needed. Plan where you think things could go before putting them away. You might have to move things around if one section doesn’t work, but that’s part of the fun.

Know that deep cleaning your garage isn’t something you need to do as often as cleaning your house. You should clean and sort through your garage items at least once a year. You’ll be surprised by how much you might acclimate in that time.

By dedicating one weekend a year to cleaning and purging items from your garage, you’ll stay on top of it. It’ll be organized and stay that way.


If you know someone who’s been meaning to tackle their garage, but needs some help, consider buying them an organizing gift certificate. I’d love to help get their garage in order once and for all. And don’t forget: I also offer contactless donation pickup. Let me take those unwanted items off of your hands.


My Advice for the Proper Steps To Take Before You Spring Clean

 
Photo by Andrea Piacquadio from Pexels

Photo by Andrea Piacquadio from Pexels

Can you feel it? The air getting warmer by the day. The sun shining longer and hotter. Spring is upon us and I don’t know about you, but I’ve never been more excited to greet a season.

It’s been a long winter. Some states saw record-breaking snow totals. Others dealt with below-freezing temperatures. Needless to say, it hasn’t been easy. But the light at the end of the tunnel is coming closer. Spring is at our doorstep.

And that means it’s time for lighter layers, outdoor activities, and spring cleaning.

There seems to be a love/hate relationship with spring cleaning. People love it because it represents a fresh start. People hate it because it can be a tedious, never-ending task trying to clean your entire house.

Luckily, I’ve developed a system that will help make the chore a little less tiresome.


Before you spring clean, spring organize

I tell friends and clients all the time, you can’t properly spring clean your home until you organize it. Why? Because if you don’t, you’re moving items around to clear the dust only to put them back in a spot they don’t belong. What is that accomplishing?

Before you start spring cleaning, follow these steps to get your home more organized. They'll make the cleaning process that much easier.

1. Collect ALL trash.

Grab yourself a box of garbage bags and do a room-by-room sweep. Collect every piece of trash you see. Have a bag for regular garbage, a bag for plastic, and a bag for paper. Check every nook, every cranny. Look under beds and behind furniture. Don’t forget under the sofa cushions!

Trust me, you’re going to find a lot. Discarded fruit snacks, half-empty water bottles, questionable globs. Get it all out of your house before you start cleaning. Will you still find trash while cleaning? Most likely, but doing this first will eliminate it getting in your way later on.


2. Declutter storage.

How many times have you stored something away and forgotten about it? Guilty as charged. We’ve all done it. Storage solutions are great, but when the items we keep in there aren’t used, all it’s doing is taking up usable space.

You're going to find things to store away while you're cleaning. It happens. What you want to make sure of is that you have plenty of storage space for these items. It’s always a good idea to sort through and declutter storage bins every couple of months.

Take a day or a weekend — depending on how much storage you have — to go through everything. Donate what you don’t want. Throw away anything broken.


3. Find a home for everything.

I know you've heard the saying, "A place for everything and everything in its place." Professional organizers talk about this all the time. Everything you own should have a place to call its own. We repeat this because it's true. If every item has a place to go at the end of the day, you'll have less clutter. And it takes no time to put the item away.

As you collect trash, gather any randomly placed items. Put them in a designated drop zone — a box or corner of a room will do — and work on them later. Make sure you work on them BEFORE you start cleaning. The last thing you want to do is deal with this massive pile of random stuff after you’ve done all that cleaning.

Photo by Dan Gold on Unsplash

Photo by Dan Gold on Unsplash

4. Put all winter things away.

Decluttering your storage will help with this task. Gather any and all winter-related stuff and put it away. Skis, winter clothing, boots, shovels, etc. Do another room-by-room sweep. You never know who might have something tucked away in their room that doesn’t belong there.

Removing all winter gear will open up a lot of space. Don’t put your spring/summer stuff out just yet! Let’s clean the area first and then we’ll work on that.


5. Repurpose before buying new.

This step goes hand-in-hand with storage decluttering. A common mistake I see many of my clients do is pre-buy storage containers. They buy with the intention to use them, but they're not sure for what yet. It’s easy to say, “I’ll need that and I’m in the store so I should get it now.” But don’t jump to conclusions.

This is why I suggest decluttering your storage first. If you find yourself donating a bunch of stuff you might have an empty container or two ready to go. You don’t want to buy containers only to have them sitting empty, taking up space.

Always try and repurpose things you have. Come across any empty shoeboxes? Hold onto them for a bit. You could use them to store keepsakes or photos. If you find you don’t need it, then throw it away. You’ll be surprised at how many things you already own perfect for storage. This way you don’t spend money on something that’ll do the exact same thing.

Preparing for spring cleaning

Now that you’ve organized, it’s time to start cleaning. Wait, no! Not yet. You have to do two things first.

You need to plan and you need to stock up.

Spring cleaning can be as long or as short as you want. You want your home to be clean but you don’t want it to feel like an endless task either.

That’s why I suggest you make a plan. Sit down and by yourself or with your family come up with a game plan. Here are some questions you should ask:

  • How many days do you want to clean for? Do you want to get this done in a weekend? A week? Figure out a realistic timeline.

  • Who’s going to do what? Spring cleaning shouldn’t be a one-person job — unless you live alone. Get your family involved. Create a game out of it. Maybe whoever has the cleanest room gets a prize.

  • Is there anything that will require special equipment? Have you been longing to shampoo your carpets, but don’t have the right tools? Do you need to rent a carpet cleaner? Write down a day to research that online.

After you’ve come up with a plan, put it somewhere the whole family can see. On the fridge. On your command center. Let everyone know the day you’re going to start. Don’t plan the day before cleaning. Give yourself at least a week to prepare, research, and stock up.

How often do you use your cleaning supplies? No judgment. I know people who use them rigorously, cleaning every week. And I know people who use them twice a year. Whichever group you fall into, it’s important to check your stock before you clean.

If any have expired, toss them. If you’ve been meaning to switch to non-toxic, plant-based brands, splurge and buy them now. Restock on items you’re low on. Gloves, rags, wipes, etc. Whatever you’re missing, take a trip to the local supermarket and stock up.

Again, don’t save this for the day before. Be as prepared as possible at least three days before you start cleaning. This will save you a lot of hassle and headaches.

Now that you have a plan and plenty of cleaning supplies, it’s time to start cleaning. Truly. You got this!

When we do a big clean of our homes, we’re bound to find things to donate. Did you know that I offer contactless donation pickup services? If you find yourself with bags of donations after your spring cleaning, contact me today. I’d be happy to take the items off of your hands. You’ll have the option to donate them to Goodwill, Family Scholar House, or St. Vincent DePaul.


The Right Way to Dispose of Expired Makeup and How to Organize What's Left

 
IMG_2123.jpg


You’re not going to want to hear this but you might be damaging your skin by using expired makeup. It’s not your fault. Most of us aren’t aware of makeups’ expiration date. When was the last time you checked?


The longevity of makeup is not as long as you think. According to Lindsay Silberman, a magazine editor and influencer from New York City, here’s how long certain makeup lasts:

  • Lipstick & gloss = 1-2 years

  • Mascara = 2-3 months

  • Foundation = 6-12 months

  • Eyeshadow = 6-12 months

  • Eyeliner & lip liner = 1 year

  • Bronzer & blush = 2 years


If you haven’t already, it might be time for a thorough declutter of your makeup stash. But don’t just throw it away. There’s a right and wrong way to dispose of makeup.


What to do with expired makeup

It may surprise you to learn that makeup is considered hazardous material. Because some of the ingredients make them highly flammable, they're dangerous to transport.


I’m not saying what you’re putting on your face is hazardous. We couldn’t use makeup if they weren’t safely tested. It’s the disposing of them where things get tricky.


Because makeup is considered hazardous waste, it’s important to know the proper method of throwing expired products out. Here are two important things to note:


1. Do not pour liquids down the drain

This can cause the chemicals to spill into our water supply. Instead, use a damp paper towel to wipe out as much of the product as possible. Then recycle the bottle if it’s plastic or glass.


2. Find a local disposal center

If you’re unable to get the majority of the product out of the bottle, throw the entire thing in the trash. Or bring it to a local disposal center. Most accept makeup as hazardous waste and have scheduled dates on their website when you can bring them in.


You can also find a Terracycle drop off bin and bring them there. I wrote about Terracycle in our decoration downsizing blog post. They truly are an amazing company.


How often should you check your makeup’s expiration date?

There’s no unanimous decision, though most agree it’s good practice to check them every couple of months. I would suggest checking your makeup stash every three months for expired products. If you don’t buy a lot of makeup then twice a year is more than enough.


Here’s a neat trick to help you along the way. Stick a label on the product the day you buy it. Simply put the month and the year. This way you can see how long you’ve had it for.


Organizing daily and overstock makeup

Now that you’ve sorted through all your makeup and properly disposed of the expired ones, it’s time for the best part: organizing it!


First, let’s separate the remaining makeup you have. Use one or more of the following systems:

  • Separate by product.

  • Separate by color.

  • Separate by size.

  • Separate by use.


Next, set aside the makeup you use daily. These are the products you’re going to want front and center. Even if they’re a mixed batch, gather them together, and push them aside.


After you’ve completed that step, it’s time to decide how you want to set things up.


The most challenging part of setting up your makeup is figuring out how you want to display it. If you don’t have much surface space you’ll want to keep it organized in drawers. If you want to keep your daily makeup out and about you want to make sure it doesn’t overtake the surface area you have.


It’s a matter of trial and error, but there are a few quick and easy methods to get things organized.


I love storing my makeup in clear containers. It helps me see all of my products at a glance. It also elevates the look of my countertop without adding unnecessary clutter to my drawers.


Here are some great surface makeup organizers:


This is where you want to organize your daily makeup. Remember, you don’t have to fill it to the brim. If your daily makeup only fills half of the space, that’s ok. Don’t add products you don’t use just to fill the organizer.


Organizing doesn’t mean cramming every available space you have. It’s about creating and maintaining a unique system that works for you. So when you’re setting up your daily makeup, only store the products you use every day.


If a clear container isn’t your aesthetic, this Lazy Susan is a great alternative. It comes with removable bins you can mix and match to your needs and takes up less space.


Once you’ve completed your daily makeup set up, let’s get the rest of it put away.


For your overstock products, try one of these drawer organization systems:


When organizing your overstock, stick to these tips:

  • Keep all similar products together. Lipsticks with lipsticks. Blush with blush. Mascara with mascara. You get the idea.

  • Pair similar colors together. You can set them up light to dark or most used to less used. You can get creative with how you store your colors, but it’s always best to keep the most used colors within reach.

  • Create a miscellaneous drawer. This is where you’ll put tweezers, backup brushes, beauty blenders, and more. The bulkier stuff you don’t need all the time but have easy access to when you do.


It’s normal to accumulate more makeup than you know what to do with. This is why it’s important to check their expiration dates every couple of months. After you’ve disposed of expired makeup you’ll be surprised by how little you have left to work with.


When it comes to makeup it’s definitely true that “less is more.” And when you realize how much makeup you throw away, you’ll become more conscious of how much you buy in the future. A win/win situation.


If you know someone whose makeup collection is taking over their life, consider buying them a gift certificate. I’d love to help them sort and toss what’s expired and better yet, to organize their entire stash.


Do you know of any other way to dispose of makeup safely? Share it with us in the comments below.


Spruce up Your Closet for Spring With These Winning Tips

 
IMG_1157.jpg

Back in October, I posted a blog about handling closet reorganization in the time of COVID-19. The demand for loungewear was up. We needed spaces to hang masks. Our work clothes were pushed to the way back, never to be touched again. Except for Zoom meetings.


Now with vaccinations rolling out and the warmer months on the horizon, I thought it was time for a closet revamp.


We only wear 20% of what we actually own. 20%! That’s it.


Since the pandemic started, that number has dropped to 15%. No doubt due to places shutting down and companies allowing employees to work from home.


But if you’re like me — excited about the warmer months — you’re looking forward to getting outside more. To dine at restaurants. To walk and shop without the threat of cold, wind, or snow.


But if you’re like me you’re also anxious about getting dressed and going back out in public. You’re worried nothing fits. You’re so used to loungewear. What’s even in style anymore?!?!


No need to panic. I’ve come up with a pretty easy step-by-step guide that tackles closet revamp with confidence.


Editing your clothes for spring

I want to note that this task might take some time. Make sure you start and finish the same day. The last thing you want is a bunch of clothes taking up valuable floor or surface space.

Consider the number of clothes you own. If you have a lot, set aside a whole day or two. If you’re more minimalistic, half a day is all you’ll need. Though one full day should be plenty of time.


Unpack your spring/summer clothes

First things first, if you haven’t already, go to storage and bring out your spring and summer clothes. If you keep these items out all year round, that’s fine. I do suggest separating them from your fall/winter clothes. This way you can see what you’re working with.


Pack your fall/winter clothes away

Pack the winter items you know you won’t need anymore. Those really thick knit sweaters. Hats, scarves, gloves. Push that puffy winter coat to the back of your closet. Again, if you keep these items out all year round, try and group them together in a section of your closet. This will keep them from getting in the way and you’ll know exactly where they are for next time.


Empty your closet

You hear professional organizers do this all the time. Completely clear the space. This shows you how much storage you have. Too often we’re so used to how we store items that we miss untapped space. By clearing your closet, you’re giving yourself a fresh perspective.


Create piles

I suggest doing this with ALL of your clothes. Do it with your fall/winter clothes before storing them away. Then do it with your spring/summer clothes before putting them in your closet.


Create four piles:

  • Love

  • Like

  • Donate

  • Trash


A quick tip for clothes you plan on throwing away. Rather than tossing them in the trash, look to see if there’s a TerraCycle or USAgain drop off bin near you. Both organizations take a variety of textiles and repurpose them. They're then sent to parts of the world that need better clothing.


Use this time to really pair down your loungewear. Instead of having ten sets, try donating five or six pairs. Keep the rest for yourself. Loungewear won’t be your forever wardrobe. Best to start cutting the ties now.


When it comes to deciding between “love” and “like,” consider the following:

  • Do I wear this at least once a week?

  • Can I match this with a lot of my other clothes?

  • Does this fit like a glove?


If you answer yes to all three of those questions then the item goes on the Love pile. Your Love pile shouldn’t be that high. If your Love is bigger than your Like pile, you need to go through those questions again.


We’ll get to what we do with the Like pile in a minute.


Put your Love items away

Once you’ve finished sorting your clothes into piles, take the ones from your Love stash and put them away. Your closet should have plenty of space left. If your Love pile fills the majority of your closet, you need to recheck a few items.


Yes, we buy clothes because we love them. But after a while clothes can lose their original sparkle. How many times did you buy a piece to complete a special outfit and now you have no use for it?


There’s a lot of reasons why we lose interest in certain clothes. And that’s the time to donate them.


Try on your Like pieces

Now that your Love pieces are out of the way, it’s time to take care of those Like pieces. This will be a bit time-consuming. Give yourself a little break before you start. Drink water. Step outside for some fresh air. Refresh your playlist.


As you try on each piece, be ruthless. If it’s too baggy don’t tell yourself you’ll get it tailored. Add it to the donation pile. If it’s too tight, don’t hang on to it in case you lose some weight. Donate it.


The point here is not to keep all of your Like pieces. You should be adding at least half of it to the Donate or Trash pile.


After you’ve finished this task put the Like items you’re keeping in your closet.

Photo by Julia M Cameron from Pexels

Photo by Julia M Cameron from Pexels


Donate ASAP

Don’t let the clothes you’re giving away sit in your home for too long. Believe me, you’ll be too tempted to look through them and decide to keep some things. Try and get rid of your Donate and Trash piles within three to five days. If you’re going on a week and they’re still there, you’ve waited too long.


Fill in the gaps

This is going to sound weird. I just told you to donate half of your wardrobe. Now I’m telling you to fill in the gaps, which means buy new clothes. WHAT?


Fill in the gaps doesn’t mean buy whatever you want. It means — for lack of a better phrase — filling in the gaps. Did you donate or toss all your black shirts because they didn’t fit or were covered in holes? A black shirt is a classic item to have in any wardrobe. It’s ok to buy yourself a new one.


Do this for certain items only. According to a Vogue article, these are The 12 Basic Clothing Items Every Closet Should Have. If it’s your style, make sure you have one of each. Don’t overbuy and don’t buy three of one piece.


Buy only what you need to fill in the gaps.


Spring cleaning your closet can be a very therapeutic task. We’re all looking forward to the day when we can dress up again. Go to restaurants, concerts, parties, and more. But let’s make sure we have the necessary clothes ready to go.


If the idea of revamping your closet for spring sounds like a project you want to pursue, check out my virtual services. We’ll navigate any area of your home to make sure it’s functional and a space you’ll love. Who doesn’t want to love their closet?


Contact me today and be sure to comment below. I’d love to hear how your wardrobe has changed since the pandemic started. What are you looking forward to wearing again?


How to Prepare Your Home for a Move With These Awesome Expert Tips

 
pexels-ketut-subiyanto-4247768.jpg

Photo by Ketut Subiyanto from Pexels

Moving is full of possibilities. There’s an excitement around breaking in a new space, in a new city, even in a new state. But moving comes with a lot of preparation.


How do you prepare for moving when you’re busy with work and life? How do you do it without losing your mind or driving your family crazy?


It’s all about preparation. You’re undertaking a huge step. It’s only fair that it comes with a lot of planning. It’s ok to feel a little overwhelmed. Take a deep breath. Moving can be made simple.


Here’s how.

What to do after you’ve decided to move


You’ve made the decision. You closed on the new house. Now what?


Tell your family


Have you told your kids yet? What about nearby relatives? Moving is a big commitment, especially if you’re moving away from family.


It’s important not to keep them in the dark too long. You’ll need their help for packing anyway so don’t put this off. Once the decision is made, tell your family about your plans. Give them time to process the news.


Budget


Moving takes time and money. You’ll need to figure out what you’re willing to spend. Can you afford to hire a moving company or are you going to do this yourself?


Consider how much packing material you’ll need and write down the estimated cost. Do you need moving insurance? Factor that in. Take into account a repair budget as well.


Set deadlines for when you want these decisions made.


Pack


Do you love or hate packing? I’ve found it’s a mixed bag — no pun intended.


When packing for a move, you have to take it one room at a time. You’ll also need to give yourself time. Remember, you still have work, school, and life to deal with. Give yourself at least a month to get the whole house packed.


Pack items you know you won’t need for a while. Seasonal clothing. Holiday decorations. Take it slow and do a thorough walk-through a few days before moving. Toss anything you find in a miscellaneous box.


Sell or donate unwanted items


If weather permits, try to have a yard sale or two before moving. Do your best to get rid of as many unwanted items as possible.


Whatever doesn’t sell, donate to local shelters, or schedule a VA pick-up. Talk to friends and neighbors. Offer anything they’re interested in. Just get rid of it.


The last thing you want is to drag unwanted stuff with you to your new home.


Fix and clean


You want to make a good impression on the people coming into your home. After you’ve packed the majority of the house, look to see if there’s anything that can be fixed.


Add a repair cost to your budget. And be sure to clean. Now that furniture is out of the way, you can finally reach those corners. As the saying goes, “Leave things better than when you found them.”


Junk removal


For any large items you’re unable to donate or sell, schedule a junk hauling company to come. Don’t just leave these pieces at the curb for neighbors to stare at for weeks.


Research local non-profits. See if any are in need of large items. Try to rid yourself of unwanted items or large pieces of furniture one to two weeks before moving.


Essential items to prepare for moving day

Photo by Ketut Subiyanto from Pexels

Photo by Ketut Subiyanto from Pexels


You’ll be surprised how many people don’t prepare the essentials they’ll need when moving. They pack everything — and I mean everything — only to dig through boxes and boxes when they get to their new home.


When preparing for a move, here are the essential items you’ll need to keep separate from everything else:

  • Overnight bag. What do you normally pack for a weekend trip? Pack all of that in an overnight bag. Clothes, toiletries, medication, chargers, etc. If you would take it on a short trip, it goes in this bag.

  • Kids’ overnight bag. What do your kids need for a short trip? Like your overnight bag, make sure you pack anything your kids might need. This includes a few of their favorite toys, snacks, activities, and toiletries.

  • Pets’ overnight bag. Don’t forget about your pet. You'd hate to get to the new house and have to dig through boxes to find your dog bowl. Also pack blankets or a small bed, toys, food, and a leash (if applicable).

  • Bathroom essentials. You’ve packed your toothbrush and face wash in your overnight bag. These essentials are other handy items you’ll need upon arrival. Hand soap, toilet paper, shampoo, conditioner, towels, and washcloths. 

  • Kitchen essentials. Is coffee the first thing you make in the morning? Then be sure to keep the maker accessible. You'll also need paper towels, plates, cups, and utensils for everyone in the household, dish soap, sponge, dish towels, and Ziploc bags.

  • Cleaning supplies. Although you hope the previous owners did this, you never know what you might find. We all have different standards for what’s clean so it’s important to have a few cleaning supplies on hand. Duster, glass cleaner, wood polish, sponges, and gloves are just a few things you should keep handy.

  • Tools. What do you do if a piece of furniture doesn’t fit through the door? Disassemble it. But you don’t have any tools. Keep a small tool kit handy. The main things you’ll probably need are a hammer, screwdriver, ruler, scissors, and an Exacto knife.

  • First aid kit. You haven’t moved properly if you don’t come out with a few scrapes and bruises. Having a first aid kit is your saving grace in these situations. Make sure you have plenty of bandages. You can also add over the counter medicine like Advil or Aleve. Trust me, you’ll be sore from all that bending and twisting.

  • Flashlights and candles. There’s always a chance of the power company not coming through. You also can’t account for a storm that might come out of nowhere. Having flashlights and candles on hand will make navigating your new home easier at night if the power goes out.


Preparing for a move can quickly overwhelm you. But with the right preparation, you can make your move a little easier.


Have enough on your plate? Don’t have time to prepare, let alone pack. Better Together can help. We’re a full-service Concierge Move Management service. We help active families and busy professionals seamlessly manage the move process. We aim to reduce the stress of moving so you and your family can focus on settling in. Contact us today.


What are some things you love and hate about moving?


How to Declutter Toys With the Help of Your Kids

 
igor-starkov-8u-OaI3MZrc-unsplash.jpg

Photo by Igor Starkov on Unsplash

As a mom of twins, I know how quickly toys can pile up. And around Christmas time the piles keep on piling up.


Leave it to Santa to bring more toys into the house. But look how happy your kids are when they open it. They can’t wait to play with them.


But what does that mean for the countless toys they currently have? What does that mean for the space you see disappearing before your eyes?


The time has come, my friends. It’s time to purge toys and there’s no better time than now.


Rules for decluttering toys


Believe it or not, there’s a right and wrong way to declutter toys.


The right way is to make sure you involve your kids.


But they’ll never let anything go! If you’re thinking that, let me assure you, getting them involved will be a lot less stressful. For everyone.


Why?


Because kids learn from watching. They learn by engaging. If you do everything behind their backs, they’ll do the same thing.


So how can you get your kids involved in decluttering their toys? Let’s look at some steadfast rules.


Have a conversation. The first and main thing you want to do is have a conversation with your kids. Explain the importance of letting go and how it’s time for another little girl or boy to have their toys.


The key thing to remember here is to encourage your child. Don’t command. By making them understand how donations work, they’ll be more inclined to help rather than argue.


Show by doing. I said it before: kids learn by watching us. Before you embark on the toy purge, see if you can declutter some of your stuff. Go through your closet. Do a run-through of the kitchen. Is there anything you can donate?


Show your kids how easy it is to let something go. If you show little sadness, they’ll follow in your footsteps.


Think about their interests. The last thing you need to do before jumping into the purge is figuring out where your kids stand. Are they super into cars right now? Do they have tea parties every day with their dolls and stuffed bears?


You don’t want to get rid of what they’re really interested in. You can limit, yes, but keeping the items they’re most likely to play with is vital to making this work.


Separate toys into categories. You know the saying, “it’s going to get worse before it gets better?” Well, here’s that moment. It’s common practice for professional organizers to remove everything from an area. This helps us see what we're working with. And I mean everything.


You’re about to do this.


Separate all the toys into like categories. Get as specific as possible. Don’t just put cars together. Separate them into big cars, little cars, trucks, construction vehicles, and so on.


Once everything is separated, ask your kids to pick 3-5 items from each pile. Those are the definite keep items. Store them away immediately so they don’t get mixed in with the donation pile.


Remove any broken items. Do a quick search and remove any toy broken beyond repair. Set them aside. Explain to your kids why broken toys shouldn’t stay in the home. They can injure themselves while playing with is a good line to use.


Check to see if there’s a similar toy like the broken one. If not and it’s a toy your child is adamant about keeping, say you’ll replace it for their birthday or a holiday.


Set limits. Giving your kids the choice to pick the toys they want is giving them a chance to take part. But it’s important to set limits. Tell them they can keep no more than five items from each pile. These are extra items than the ones they picked earlier.


This is going to be hard for them. If they fuss, give them a few minutes. Don’t rush this process. Remember, these toys mean a lot to them. Acting as if they’re pieces of junk won’t teach your kids the proper method of letting go.


Create an out of sight bin. After your kids select the toys they want to keep, don’t instantly give the rest away. Tell your kids to select another 3-5 toys from each pile. I know. Bear with me a little longer. Call these “back-up toys.” Whatever they select, store in a clearly marked storage container. Label it “Donate in 6 Months.” Store it somewhere out of sight.


If your child doesn’t ask for anything inside of that bin after six months, donate them. If they do, remove the one item they ask for and keep the rest out of sight.


Be consistent. Consider purging toys once or twice a year. Do it around Christmas time when you know new toys will be coming into the home. The second time could be in the summer. By making this a consistent practice, your kids will grow more accustomed to it. They’ll know every December or January it’ll be time to say goodbye to some toys.


You can declutter toys without your kids. If there’s a toy you’ve watched collect dust over the year, remove it. Don’t toss it right in the garbage. Put it in the six-month bin. If your kids don’t notice it missing in that time, feel free to donate it.


Remember, encouraging your kids to participate in this process is crucial. Make it a learning experience.


Again, understand how hard this will be for them. Be there to comfort them and remind them how happy they’re going to make another little boy or girl.


Where to donate used toys

Photo by Tim Mossholder on Unsplash


Once you’ve gone through all the toys, now what?


Thankfully, there’s plenty of places you can send used toys to. Here is a starter list:

  • Goodwill or Salvation Army

  • Veterans of America

  • Local churches and preschools*

  • Ronald McDonald House

  • Toys For Tots

  • Consignment stores

  • Local women and children shelters


*Be sure to contact churches and preschools before donating. Since COVID, their rules for toy donations may have changed. It’s good to know ahead of time if you need to do anything — like clean the toys — before dropping them off.


Pro tip: clean the toys anyway.


If you have to drop the items off, consider taking your kids along. Let them experience the pure joy and happiness of someone receiving their toys. It’ll encourage them to do it again in the future and make saying goodbye a little easier.

Schedule your free consultation today and let’s talk about getting your playroom organized. And be sure to follow my Instagram for organizing tips and updates.


Unexpected Benefits of Downsizing and Why Now Is the Time to Consider It

 
Photo by Phil Hearing on Unsplash

A lot of people are moving after quarantine. Because of the country’s current conditions, some think bigger homes with offices and workout rooms is the way to go. But I’ve been noticing a different trend. 

Families are moving away from the 5,000 square foot homes into smaller houses closer to town. 

This is surprising since the pandemic has made most of us ache for more space.

But the moms I help are sick of being in the car. They drive back and forth from school, their kids’ activities, and more. They want more time with their family. They want to enjoy a home-cooked meal rather than rely on a drive-thru or take out.

Their solution?

Downsizing their home.

There’s a lot of reasons why families decide to downsize. It’s not only because of the pandemic. Financial, life change, and location are three key elements people decide to downsize.

Less is more has never taken on a greater meaning than it has in these times.

You might be reading this shaking your head and thinking I could never live in a smaller house. I have X amount of kids! 


I’ve already helped a family downsize from a large house to a smaller home closer to their son’s school. You know what? They love it. 

Yes, it takes some creativity. You don’t want to have furniture in a small house making it feel like the walls are closing in on you.

You want to feel like there’s even more space. And it’s possible.

The unexpected benefits of downsizing your home

Still on the fence? Let’s dive deeper.

When people downsize, they’re not sure what to expect. But getting used to a smaller home is easier when you notice the bonuses. People who have downsized have noticed these unexpected benefits:

  • They save on furniture and general upkeep, which means less spending.

  • A smaller home means less cleaning and maintenance.

  • Less space means saving on heating, cooling, and other energy costs.

  • Traveling is easier since a smaller home is easy to take care of in their absence.

  • They discover new organizing systems and processes to keep things in order.


Living small doesn’t mean you’re giving up anything. Are you giving up space, yes, but you find new and creative ways to live. Downsizing doesn’t mean you’ll be cramped. I’ve seen and helped clients who actually find smaller homes cozier.

The trick is preparation. And knowing why.

Don’t just downsize because it’s a trend. Downsize for the right reasons. 

Has the pandemic made you realize your job in proportion to your child’s school is too great a distance? Are you tired of cleaning rooms no one uses? Are you sick of having to drive twenty minutes to get anywhere (the grocery store, shops, a coffeehouse, etc)? 


Ask yourself these questions and consider them carefully. Have a conversation with your significant other. Maybe they’ve been feeling a need for change, but haven’t felt confident saying anything yet. 


Talk about what you both want and if downsizing might be an option for you and your family.


Downsizing home checklist

Preparation is key when embarking on any new journey. Downsizing your home — if you choose to go down that path — can be a daunting task. 


Check out my foolproof checklist on how to get through this with as little stress as possible.

  • Start early. I said before, preparation is vital. You can’t expect to crush any plan without first sitting down and figuring out the steps you need to take. If you plan on moving by April, the best time to start planning is now.

  • Figure out a budget. Once you decide your deadline, next up is budget planning. What are you willing to spend? Remember, some of your big furniture might not be able to come with you. What can you shell out for new stuff? Even if you’re off by a few hundred dollars, write it down. You can adjust later.

  • Scout locations. Next is to figure out where you plan on moving to. Research as many areas as possible. Take into account when looking what you want in a new space. Consider cost and nearby essentials. How far is the nearest supermarket? Your kids’ school? Your job?

Photo by Ketut Subiyanto from Pexels

Photo by Ketut Subiyanto from Pexels

  • Begin packing. Once you found and locked in your new place, it’s time to start packing. Pack the items you know you’ll have room for. You hopefully scooped out the new place and got some measurements. This will help significantly when packing.

  • Eliminate rooms you won’t have. How many rooms does your new place have? If you downsized right it should be less than what you have now. Here’s where creativity comes in. You need to figure out how to make up for those fewer rooms.

  • Get rid of duplicates. We’re known to overbuy. But now is the time to rid yourself of any unnecessary duplicate items. Remember, you won’t have the same amount of storage space. Ask yourself: Do you really need two whisks? What about those two black wool jackets? 

  • Reduce collections. You love your salt n’ pepper shaker collection. But your new home doesn’t have space for all of them. Here’s where it gets hard. Select your favorites. No more than five. Gather the rest and take a few photos for memories. Believe me, it’ll be tough. No one said downsizing is easy.

  • Sell or re-gift items. For those pieces you know for a fact you’re not taking, have a yard sale a few weeks before moving day. Do your best to sell or re-gift as many unwanted items as possible. Whatever remains you can donate to the charity of your choice. But make sure these items are out of your hair long before you move.

  • Allow time to reminisce. As I said before, downsizing isn’t easy. You’re leaving behind a lot. Give yourself time to say goodbye. It might seem funny, but we get attached to our things. Saying a proper goodbye and reliving the memories it gave you is normal. Take that time.

  • A chance to bond. Downsizing and decluttering is a great family bonding experience. Teach your kids how important it is to let stuff go when it no longer serves a purpose. Relive memories together. Take pictures of them with childhood toys. Make it fun, yet educational.

Choosing to downsize won’t be an easy decision. It’ll require planning, preparation, and a lot of decluttering. But the reward is worth the hassle. At least from what I’ve seen.


If you’re thinking of downsizing, reach out and schedule a consultation with me. I’d be happy to tell you how we can help you on this journey.